Giỏ hàng
0 Sản Phẩm

7.076.550₫
5400 RPM
30 DAY WARRANTY NOW Cache
PATA
For Daily Computing
3 years limited
if (typeof (Webcollage) == “undefined”) {
jQuery.ajax({
type: “GET”,
url: “https://scontent.webcollage.net/api/v2/product-content”,
success: function () {
Webcollage.loadContent(“newegg”,
“N82E16822136345”,
{ reload: true })
},
dataType: ‘script’,
cache: true
});
} else {
Webcollage.loadContent(“newegg”,
“N82E16822136345”,
{ reload: true })
}
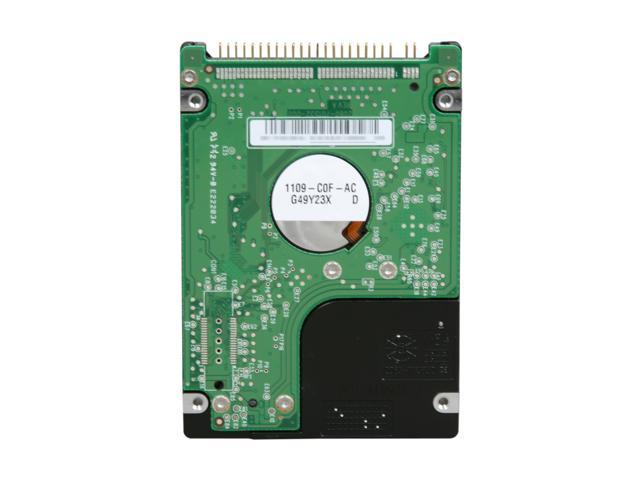
| Brand | Western Digital |
|---|---|
| Series | Scorpio Blue |
| Model | WD3200BEVE |
| Packaging | Bare Drive |
| Interface Interface | PATA |
|---|---|
| Capacity | 320GB |
| NAND Flash Memory Type | 30 DAY WARRANTY NOW |
| Cache Cache | 30 DAY WARRANTY NOW |
| Average Seek Time Average Seek Time | 30 DAY WARRANTY NOW |
| Average Write Time | 30 DAY WARRANTY NOW |
| Average Latency Average Latency | 30 DAY WARRANTY NOW |
| RPM RPM | 5400 RPM |
| Windows Vista | 30 DAY WARRANTY NOW |
|---|---|
| Features | 30 DAY WARRANTY NOW |
| Usage | For Daily Computing |
| Form Factor Form Factor | 2.5″ |
|---|---|
| Height (maximum) | 9.5mm |
| Width (maximum) | 69.75mm |
| Length (maximum) | 100.3mm |
| Date First Available | April 08, 2016 |
|---|
Pros: This is a great drive to extend the life of an older laptop. I have used several of these drives in older P3 and P4 laptops that came with Windows XP or Windows 2000. Be sure to split the hard drive into two logical drives, and make sure Drive C has 120 GB or less (as reported by Windows Explorer).
Cons: Windows 2k and XP will let you give Drive C all 320GB — you will be VERY SORRY if you do this. If you make Drive C 120GB (as reported by Windows Explorer) and let Drive E: have all the rest, you will have no trouble. If you let Drive C have all 320GB, you will get the major file corruption errors reported by other reviewers.
WD doesn’t mention the laptop BIOS 48bitLBA drive C limitation, so in many of these reviews you will read about lots of file corruption problems. These do not occur if you make Drive C 120GB and give the rest to Drive E. (This applies to the WD 160, 250, and 320GB ATA-6 drives.)
Note: you also need to update Windows to the latest service pack.
Overall Review: Older laptops do not use 48-bit addressing needed for the BIOS to handle more than 120GB. Since the BIOS interacts only with Drive C, you must make Drive C 120GB or smaller (as reported by Windows Explorer); then make a second drive partition (Drive E:) with all the rest of the space. I use the free EASEUS Disk Copy and Partition Master software for these tasks. Put the new drive in an external USB case, boot to Disk Copy, copy all of Drive 0 to Drive 1. When the copying is done, turn off the computer, install the new parallel drive, and then use Partition Master to resize drive C of the new drive to <137 GB. Verify that Windows Explorer sees the drive as 120GB or less! Then use Partition Master to create a new drive E with all the rest.
By the way, there are two ways to report drive capacity. That is why Partition Master will say Drive C has 137GB while windows reports the drive as only 120 GB.
PS. DO NOT MAKE DRIVE C HAVE ALL 320GB, OR YOU WILL BE VERY SORRY.
Pros: 1. Easy part for part replacement for dying 80gb drive
2. quieter than original drive
3. lower heat than original drive
4. larger capacity than original drive
Cons: No real cons for the drive. It was just painful taking the mac apart and putting it back together.
Overall Review: I recommend having a can of compressed air handy. If you are replacing the drive on on your powerbook and trying to squeeze out some life, your computer has at least 4 years of dust inside of it. Blow out the dust from the fans. Also, you should be able to find installation instructions on the web for taking the system apart/installing the drive. For the most part, the 12″ powerbooks were extremely similar, so you should be able to take it apart based on online instructions. You will also need torx screw drivers to do it, in addition to the minis you may already have. GOOD LUCK!
Pros: Easy to clone existing 100MB HD in Acer Travelmate 4202 using a Rosewill 2.5″ external IDE to USB enclosure along with the WD3200BEVE 320MB drive. Utilized Acronis from WD website to partition the HD and cloning the old one. Only issue which was very minor (due to not reading instructions!) was it took me about 10 minutes to figure out I needed to use Windows XP disk management tool to format the drive so it would show up under “My Computer”. After that it was a piece of cake. Swapped out the old drive for the new and off and running in about 2 hours, which most was spent cloning the drive.
Cons: None so far
Pros: Lots of drive space as upgrade to 60GB that was in the D610 and D810. Faster r/w access times then old drives.
Cons: Cost more then SAS drives of comparable size, but IDE is only choice to upgrade these latitude models.
Overall Review: On both a D610 and D810 I found no way to format as 1 single 320GB drive (really only 300GB after NTFS format.) Had to format in 2 partitions. Latitude has a 137 GB limit when recognizing drives. Even called Dell before purchase and they said the OS has no limititation which is true, but Dell’s BIOS only sees 137 GB. I was at latest BIOS version.
Therefore partitioned into a 135 GB partition for OS and remainder for Data. Optimally I would have like all in 1 partition. If I really wanted to I could use a partition utility to make a single partition.
Pros: Much more quiet than the original Toshiba 80GB HDD that came with my Dell Inspiron 6000
Cons: Runs just as hot as the Toshiba…
Overall Review: Folks if you are planing on making the upgrade for your older Dell Inspirons please know that the hardware will not recognize anything beyond 128Gb. If you try running a clean install it will reformat your drive the first time then go into a cyclical “Disc Read Error”. The workaround is the following: partition the drive until you have < 128Gb to each. Devout 1 specifically to the OS and crucial drivers.
Pros: Very quiet, runs cooler than old drive it replaced. The 3x increase in storage capacity is GREAT and the combination deal adding the external 2.5″ HDD case for just a buck comes in handy when it’s time to clone the new drive.
Easily cloned using Acronis Drive Image “Disk Clone” option.
Cons: An easily fixed installation issue NOT attributed to the new drive…
The cloned drive did not boot normally into Windows XP Pro SP3. The screen displayed a cryptic DOS screen error message: “Windows could not start because of the following ARC firmware boot configuration problem: Did not properly generate ARC name for HAL and system paths. Please check the Windows documentation about ARC configuration options and your hardware reference manuals for additional information.” Simple solution below…
Overall Review: If this error message occurs, you have to edit the hidden system file boot.ini. Search Google using text string “Did not properly generate ARC name for HAL and system paths”. Look for search result to a domain called tek-tips. This has the essential answer to make the drive operational. Summary below…
You must boot to DOS from a floppy (Win98 startup disk) or a bootable Windows startup CD. From a DOS command line, change file attributes for boot.ini in the root directory of the new C: drive,
DOS: attrib +a -s -h -r c:boot.ini [Enter].
Then edit 2 lines in boot.ini and save the file.
Restore the original file attributes
DOS: attrib +a +s +h +r c:boot.ini [Enter] and reboot.
On my pc the 5-line fixed boot.ini reads exactly as below where “multi(0)” replaces a longer string in the old file:
[boot loader]
timeout=30
default=multi(0)disk(0)rdisk(0)partition(1)WINDOWS
[operating systems]
multi(0)disk(0)rdisk(0)partition(1)WINDOWS=”Microsoft WIndows XP Professional
Pros: If you have one of the few remaining PATA systems, this is the hard drive for you.
Cons: I honestly cannot think of any.
Overall Review: I used this drive two years ago to back up my failing 80 GB hard drive for my hp zd7260us. My computer recently died, so this is now a great external hard drive. I never had a problem with it (and if I remember correctly, it was a little quieter than my old drive).


NGUỒN HÀNG ĐẢM BẢO
Hàng hóa trên HQG.VN được bán bởi các các nhà cung cấp lớn và uy tín nhất thế giới.

GIÁ CẢ CẠNH TRANH
HQG.VN đem đến cơ hội mua sắm hàng hóa chất lượng quốc tế, giá Việt Nam cho tất cả mọi người.

GIAO HÀNG TOÀN QUỐC
HQG.VN giao hàng miễn phí tới tất cả 63 tỉnh thành trên toàn quốc.

THANH TOÁN THUẬN TIỆN
Hỗ trợ nhiều phương thức thanh toán. Được đảm bảo an toàn tuyệt đối bởi nganluong.vn

BẢO HÀNH SẢN PHẨM
HQG.VN có chính sách bảo hành chính hãng cho các sản phẩm

HỖ TRỢ 24/7
Tổng đài hỗ trợ: 028.7309.6999
Bảo hành 24/7: 1900636106


if (typeof (Webcollage) == “undefined”) {
jQuery.ajax({
type: “GET”,
url: “https://scontent.webcollage.net/api/v2/product-content”,
success: function () {
Webcollage.loadContent(“newegg”,
“N82E16822136345”,
{ reload: true })
},
dataType: ‘script’,
cache: true
});
} else {
Webcollage.loadContent(“newegg”,
“N82E16822136345”,
{ reload: true })
}
| Brand | Western Digital |
|---|---|
| Series | Scorpio Blue |
| Model | WD3200BEVE |
| Packaging | Bare Drive |
| Interface Interface | PATA |
|---|---|
| Capacity | 320GB |
| NAND Flash Memory Type | 30 DAY WARRANTY NOW |
| Cache Cache | 30 DAY WARRANTY NOW |
| Average Seek Time Average Seek Time | 30 DAY WARRANTY NOW |
| Average Write Time | 30 DAY WARRANTY NOW |
| Average Latency Average Latency | 30 DAY WARRANTY NOW |
| RPM RPM | 5400 RPM |
| Windows Vista | 30 DAY WARRANTY NOW |
|---|---|
| Features | 30 DAY WARRANTY NOW |
| Usage | For Daily Computing |
| Form Factor Form Factor | 2.5″ |
|---|---|
| Height (maximum) | 9.5mm |
| Width (maximum) | 69.75mm |
| Length (maximum) | 100.3mm |
| Date First Available | April 08, 2016 |
|---|
Pros: An excellent drive if you partition it correctly. If your laptop isn’t 46-bit LBA compliant (like most laptops that use this Parallel ATA drive), you must make drive C no more than 128GiB (as reported by Windows explorer). Create another logical drive (E) to contain the rest of the space. Windows will let you give Drive C all 320GB, and that will seem to work fine …until it doesn’t. Often following a defrag, you will eventually be greeted with a black screen, boot sector errors, and data corruption. The recovery process is very agonizing, and you may not get your data back. None of that happens if your drive C is <128GB (reported by Windows explorer).
Cons: WD does not warn you of the 28-bit vs 46-bit LBA BIOS limitation, and the info is hard to find.
Overall Review: You’ll need Windows XP SP1 or later or Win2k SP2 or later to use the drive’s full capacity. EASEUS Disk Copy and an external usb case make the transfer very easy. Clone your existing drive, and then use EASEUS Partition Manager to resize drive C and create logical drive E.
Laptop BIOS normally uses 28-bit addressing and can read only the first 137.4GB of space (reported by Windows as 128GiB). If you let Drive C have all 320GB of space, you will eventually get data corruption and black screens. Here’s why. Windows defrag can store the OS files anywhere on the drive. If you make drive C >128GB, part of the OS will eventually be written beyond where the BIOS can read at startup. When that happens, you get missing NTLDR, missing system files, the dread black screen, damaged boot sector, and bad data corruption. None of these will happen if you make Drive C 128GiB max.
Pros: This is a great drive to extend the life of an older laptop. I have used several of these drives in older P3 and P4 laptops that came with Windows XP or Windows 2000. Be sure to split the hard drive into two logical drives, and make sure Drive C has 120 GB or less (as reported by Windows Explorer).
Cons: Windows 2k and XP will let you give Drive C all 320GB — you will be VERY SORRY if you do this. If you make Drive C 120GB (as reported by Windows Explorer) and let Drive E: have all the rest, you will have no trouble. If you let Drive C have all 320GB, you will get the major file corruption errors reported by other reviewers.
WD doesn’t mention the laptop BIOS 48bitLBA drive C limitation, so in many of these reviews you will read about lots of file corruption problems. These do not occur if you make Drive C 120GB and give the rest to Drive E. (This applies to the WD 160, 250, and 320GB ATA-6 drives.)
Note: you also need to update Windows to the latest service pack.
Overall Review: Older laptops do not use 48-bit addressing needed for the BIOS to handle more than 120GB. Since the BIOS interacts only with Drive C, you must make Drive C 120GB or smaller (as reported by Windows Explorer); then make a second drive partition (Drive E:) with all the rest of the space. I use the free EASEUS Disk Copy and Partition Master software for these tasks. Put the new drive in an external USB case, boot to Disk Copy, copy all of Drive 0 to Drive 1. When the copying is done, turn off the computer, install the new parallel drive, and then use Partition Master to resize drive C of the new drive to <137 GB. Verify that Windows Explorer sees the drive as 120GB or less! Then use Partition Master to create a new drive E with all the rest.
By the way, there are two ways to report drive capacity. That is why Partition Master will say Drive C has 137GB while windows reports the drive as only 120 GB.
PS. DO NOT MAKE DRIVE C HAVE ALL 320GB, OR YOU WILL BE VERY SORRY.
Pros: 1. Easy part for part replacement for dying 80gb drive
2. quieter than original drive
3. lower heat than original drive
4. larger capacity than original drive
Cons: No real cons for the drive. It was just painful taking the mac apart and putting it back together.
Overall Review: I recommend having a can of compressed air handy. If you are replacing the drive on on your powerbook and trying to squeeze out some life, your computer has at least 4 years of dust inside of it. Blow out the dust from the fans. Also, you should be able to find installation instructions on the web for taking the system apart/installing the drive. For the most part, the 12″ powerbooks were extremely similar, so you should be able to take it apart based on online instructions. You will also need torx screw drivers to do it, in addition to the minis you may already have. GOOD LUCK!
Pros: Easy to clone existing 100MB HD in Acer Travelmate 4202 using a Rosewill 2.5″ external IDE to USB enclosure along with the WD3200BEVE 320MB drive. Utilized Acronis from WD website to partition the HD and cloning the old one. Only issue which was very minor (due to not reading instructions!) was it took me about 10 minutes to figure out I needed to use Windows XP disk management tool to format the drive so it would show up under “My Computer”. After that it was a piece of cake. Swapped out the old drive for the new and off and running in about 2 hours, which most was spent cloning the drive.
Cons: None so far
Pros: Lots of drive space as upgrade to 60GB that was in the D610 and D810. Faster r/w access times then old drives.
Cons: Cost more then SAS drives of comparable size, but IDE is only choice to upgrade these latitude models.
Overall Review: On both a D610 and D810 I found no way to format as 1 single 320GB drive (really only 300GB after NTFS format.) Had to format in 2 partitions. Latitude has a 137 GB limit when recognizing drives. Even called Dell before purchase and they said the OS has no limititation which is true, but Dell’s BIOS only sees 137 GB. I was at latest BIOS version.
Therefore partitioned into a 135 GB partition for OS and remainder for Data. Optimally I would have like all in 1 partition. If I really wanted to I could use a partition utility to make a single partition.
Pros: Much more quiet than the original Toshiba 80GB HDD that came with my Dell Inspiron 6000
Cons: Runs just as hot as the Toshiba…
Overall Review: Folks if you are planing on making the upgrade for your older Dell Inspirons please know that the hardware will not recognize anything beyond 128Gb. If you try running a clean install it will reformat your drive the first time then go into a cyclical “Disc Read Error”. The workaround is the following: partition the drive until you have < 128Gb to each. Devout 1 specifically to the OS and crucial drivers.
Pros: Very quiet, runs cooler than old drive it replaced. The 3x increase in storage capacity is GREAT and the combination deal adding the external 2.5″ HDD case for just a buck comes in handy when it’s time to clone the new drive.
Easily cloned using Acronis Drive Image “Disk Clone” option.
Cons: An easily fixed installation issue NOT attributed to the new drive…
The cloned drive did not boot normally into Windows XP Pro SP3. The screen displayed a cryptic DOS screen error message: “Windows could not start because of the following ARC firmware boot configuration problem: Did not properly generate ARC name for HAL and system paths. Please check the Windows documentation about ARC configuration options and your hardware reference manuals for additional information.” Simple solution below…
Overall Review: If this error message occurs, you have to edit the hidden system file boot.ini. Search Google using text string “Did not properly generate ARC name for HAL and system paths”. Look for search result to a domain called tek-tips. This has the essential answer to make the drive operational. Summary below…
You must boot to DOS from a floppy (Win98 startup disk) or a bootable Windows startup CD. From a DOS command line, change file attributes for boot.ini in the root directory of the new C: drive,
DOS: attrib +a -s -h -r c:boot.ini [Enter].
Then edit 2 lines in boot.ini and save the file.
Restore the original file attributes
DOS: attrib +a +s +h +r c:boot.ini [Enter] and reboot.
On my pc the 5-line fixed boot.ini reads exactly as below where “multi(0)” replaces a longer string in the old file:
[boot loader]
timeout=30
default=multi(0)disk(0)rdisk(0)partition(1)WINDOWS
[operating systems]
multi(0)disk(0)rdisk(0)partition(1)WINDOWS=”Microsoft WIndows XP Professional
Pros: If you have one of the few remaining PATA systems, this is the hard drive for you.
Cons: I honestly cannot think of any.
Overall Review: I used this drive two years ago to back up my failing 80 GB hard drive for my hp zd7260us. My computer recently died, so this is now a great external hard drive. I never had a problem with it (and if I remember correctly, it was a little quieter than my old drive).


Pros: An excellent drive if you partition it correctly. If your laptop isn’t 46-bit LBA compliant (like most laptops that use this Parallel ATA drive), you must make drive C no more than 128GiB (as reported by Windows explorer). Create another logical drive (E) to contain the rest of the space. Windows will let you give Drive C all 320GB, and that will seem to work fine …until it doesn’t. Often following a defrag, you will eventually be greeted with a black screen, boot sector errors, and data corruption. The recovery process is very agonizing, and you may not get your data back. None of that happens if your drive C is <128GB (reported by Windows explorer).
Cons: WD does not warn you of the 28-bit vs 46-bit LBA BIOS limitation, and the info is hard to find.
Overall Review: You’ll need Windows XP SP1 or later or Win2k SP2 or later to use the drive’s full capacity. EASEUS Disk Copy and an external usb case make the transfer very easy. Clone your existing drive, and then use EASEUS Partition Manager to resize drive C and create logical drive E.
Laptop BIOS normally uses 28-bit addressing and can read only the first 137.4GB of space (reported by Windows as 128GiB). If you let Drive C have all 320GB of space, you will eventually get data corruption and black screens. Here’s why. Windows defrag can store the OS files anywhere on the drive. If you make drive C >128GB, part of the OS will eventually be written beyond where the BIOS can read at startup. When that happens, you get missing NTLDR, missing system files, the dread black screen, damaged boot sector, and bad data corruption. None of these will happen if you make Drive C 128GiB max.